
How to Set Up a Rooftop Tent: The Complete Guide for Adventurers
How to Set Up a Rooftop Tent, Setting up a rooftop tent transforms your vehicle into a mobile campsite, giving you instant shelter, comfort, and an elevated view of your surroundings. Whether you’re heading on a weekend getaway, a road trip, or an over landing adventure, knowing how to set up your rooftop tent properly can make all the difference between a stressful experience and a relaxing night under the stars.
If you’re a first-time rooftop camper, the process might feel a little intimidating. But don’t worry — with patience and a few simple steps, you’ll have your tent up and ready in no time. This guide walks you through everything you need to know to set up your rooftop tent safely and efficiently.
Step 1: Find a Flat and Stable Surface#How to Set Up a Rooftop Tent
The first and most important step is to park your vehicle on level ground. Uneven or sloped terrain can make your tent unstable, and climbing in and out could become tricky or unsafe.
- Look for a flat surface free of rocks, debris, or soft patches.
- Make sure your ladder has a stable base.
- Avoid gravel or sand that could shift under weight.
A level setup ensures your tent stays steady during the night and keeps you safe while climbing in and out. It also prevents discomfort while sleeping, so you wake up refreshed for your adventure.
Step 2: Unfasten the Tent Cover#How to Set Up a Rooftop Tent
Most rooftop tents come with a protective cover to shield the tent from dirt, rain, and road debris during travel.
- Undo all straps, buckles, or zippers around the cover.
- Carefully remove the cover and set it aside in a dry, clean place.
- Avoid tugging or pulling aggressively to prevent damaging the tent fabric.
This step prepares your tent for unfolding and ensures the tent fabric remains in good condition for long-term use.
Step 3: Deploy the Ladder and Tent Base
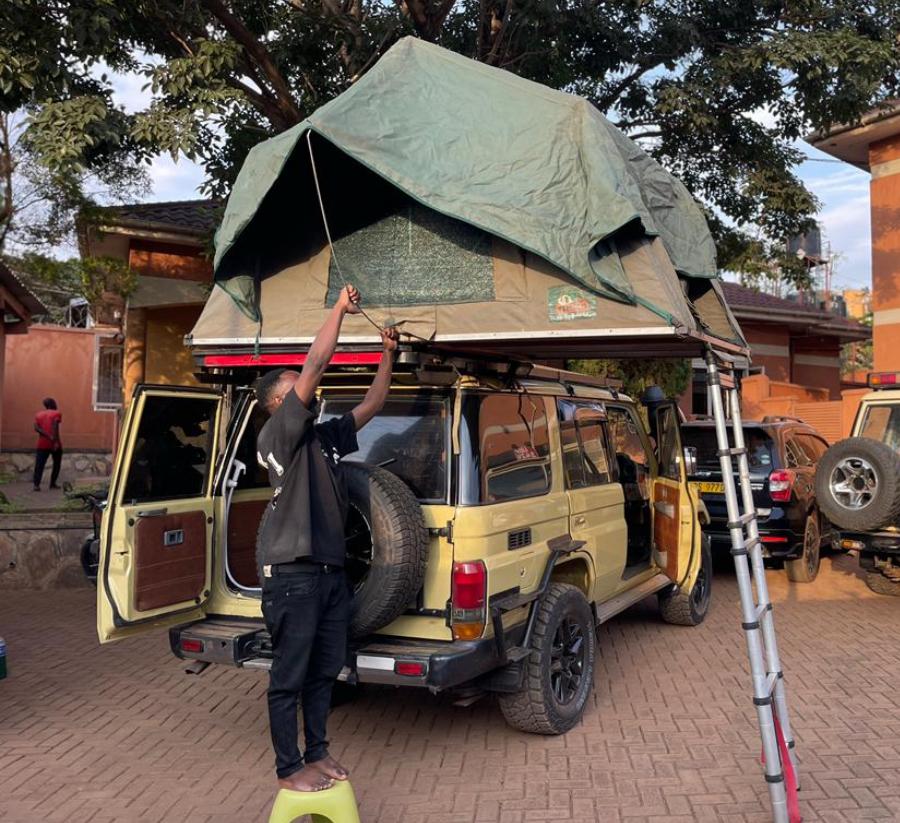 Many rooftop tents are designed so that the ladder also acts as the lever to unfold the tent base.
- Pull the ladder down until it reaches the ground.
- Adjust the ladder so it’s fully extended and securely planted.
- As you lower the ladder, the tent base will naturally unfold.
A properly deployed ladder provides stability and safe access to your rooftop tent. Take your time to make sure it’s secure, especially if you’re camping in windy conditions.
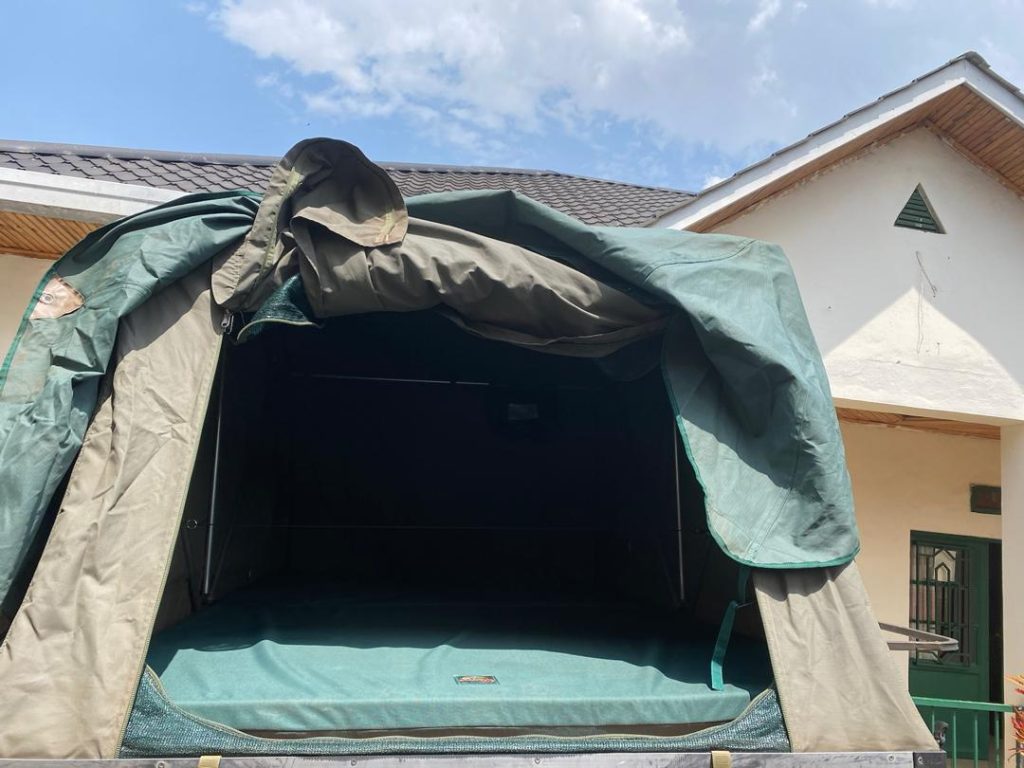
Step 4: Fully Extend the Tent
After setting up the base, it’s time to expand the tent completely.
- Pull out the remaining fabric sections and support poles gently.
- Check that all corners are properly stretched and symmetrical.
- Ensure support arms or internal poles lock into place for stability.
A fully extended rooftop tent is more resilient against wind, rain, and uneven pressure. Taking the time to extend it correctly ensures a safe and comfortable shelter.
Step 5: Set Up the Rainfly and Windows
Most rooftop tents come with a rainfly for extra protection. The rainfly keeps you dry from rain, morning dew, and condensation.
- Secure the rainfly using designated hooks, straps, or buckles.
- Make sure it covers the entire tent without sagging.
- Open the tent windows and attach support rods for proper ventilation.
This step allows airflow while maintaining protection from weather, helping regulate temperature inside your tent and keeping bugs at bay.
Step 6: Add Bedding and Essentials
 Once your tent is stable, it’s time to make it cozy:
- Lay out sleeping bags, pillows, or lightweight blankets.
- Place essential items like a flashlight, water bottle, phone, or book within arm’s reach.
- Pack additional items such as a small camping lantern or travel pillow for maximum comfort.
Rooftop tents are designed to store bedding even when folded, making setup for your next trip faster and hassle-free.
Step 7: Double-Check Everything
Before calling it a night, inspect your tent setup:
- Ensure the ladder is sturdy and all straps or buckles are fastened.
- Check that zippers close properly and the tent fabric is evenly stretched.
- Look for sagging areas or potential water pooling points.
A quick once-over ensures your rooftop tent is secure, safe, and ready for any weather conditions. Safety checks also prevent accidents during entry and exit.
Tips for First-Time Rooftop Tent Users
- Practice at home first – Familiarize yourself with the setup before heading into the wild.
- Keep your gear organized – Store essentials in a small bag inside the tent for easy access.
- Check the weather – Make sure the rainfly is secure in case of sudden showers.
- Use a lightweight mattress – Some rooftop tents have foldable mattresses; a comfortable one enhances your sleep.
- Invest in high-quality gear – Durable tents, ladders, and accessories make setup faster and safer.
Why Rooftop Tents Are Perfect for Over landing
 Rooftop tents offer several advantages over traditional ground tents:
- Quick setup and pack-up for road trips
- Elevated sleeping platform for safety and comfort
- Amazing panoramic views of your surroundings
- Easy storage of bedding and camping essentials
- Ideal for remote locations and uneven terrain
With the right setup, rooftop tents provide a stress-free camping experience and allow you to enjoy nature in comfort.
Conclusion
Learning to set up a rooftop tent is essential for every camper and overlander. Once you master it, you’ll be able to enjoy comfortable nights, amazing views, and unforgettable memories wherever you go.
- Find a flat surface
- Unfold your tent and ladder
- Extend the tent fully and secure the rainfly
- Add bedding and essentials
- Double-check everything
With the right preparation, patience, and gear, rooftop camping becomes a simple and enjoyable experience. Gear up, get outdoors, and let the adventure begin!